2017-05-09

Create a disk in the FreeCAD


Start FreeCAD:
內嵌影像

select "Part Design"
內嵌影像

Click "Create a new empty document":
內嵌影像
Click "Tasks>Create Geometry>Create sketch":
內嵌影像

Select XY0Plane, Click OK:
內嵌影像

Click "Create a circle in the sketcher":
內嵌影像

Click center:
內嵌影像

Extend the circle:
內嵌影像

Click again at the correct location:
內嵌影像
Right click to exit the circle mode.

Click "Task>Close":

Click "Tasks>Sketch tools>Pad":
內嵌影像
Set the "Pad parameters>Length" and click "Task>OK":
內嵌影像
Click "Set To front view(1)":
內嵌影像
Click "Set to axonometric view(0)":
內嵌影像


內嵌影像


2017-03-15

Weka Data Mining example 1- Regression with autoMpg.arff

Waikato Environment for Knowledge Analysis (WEKA):

Start Weka GUI.


Click Explorer Button to start the Weka Explorer.


Download regression data from the Weka DataSet page:

Copy and unzip it to the data directory under the directory where the Weka was installed, like "C:\Program Files\Weka-3-8\".

Click Open file Button to open a data file
Find the directory "C:\Program Files\Weka-3-8\data\datasets-numeric\numeric\"
Then select the "autoMpg.arff" to find out a regression model to predict the miles per gallon (MPG) for a car.


Weka loads the data and shows Attributes of this data file.
Click the "Classify" tab on upper side of the window.
Click "Choose" button within the Classifier area.
Select LinearRegression under the branch of the tree  "weka-classifiers-functions".


Click the Start button. 


We can see the result of the Linear Regression.


2016-07-27

CubicPower 3D Taipei Street VR Viewer has got to the Taiwan Open Data competition final

CubicPower 3D Taipei Street VR Viewer has got to the Taiwan Open Data competition final. This service combines the OpenStreetMap and Taipei city marks data to produce a virtual 3D view on the browser.

2016-06-28

Raise or Lower Terrain by the Unity Terrain Editor

 Steps of building terrain by the Unity Terrain Editor:


1. Start

GameObject> 3D Object> Terrain


Hierarchy> Terrain
Inspector> Terrain> Raise/Lower Terrain

Use the selected brush to raise terrain in the scene view.

Inspector> Terrain>  Paint Height
Inspector> Terrain>  Settings>  Height>   20


 Brush inner lower area.

Inspector >  Terrain>  Settings>   Height>   50

Brush outer higher area.


2016-06-15

Debug the Odoo in Ubuntu with different user name

Once we've installed the Odoo as a service in Ubuntu, Odoo will be started up automatically. If we want to debug the Odoo, we should stop the Odoo service first. Also, we will encounter the "Peer authentication failed for user "odoo"" error if our login user name is not odoo. In order to conquer these problems we should do the following steps:

1. Stop service:
sudo service odoo stop

2. set the user odoo as a trusted user to all databases from local:
sudo nano /etc/postgresql/9.3/main/pg_hba.conf
 
then add the following line into the file:
local all odoo trust
 
then restart the postgresql:
sudo service postgresql restart

3. Start odoo with the db user odoo:
cd /usr/bin
./odoo.py -r odoo


Reference:

Peer authentication failed for user "odoo"

2016-05-30

Build our own Linux Web Server with XAMPP

If we want to set up our own web server on the Linux platform,  installing an XAMPP (Apache+MariaDB+PHP+Perl on the different platforms) will be the easiest way.  Here I show the basic installation procedures as follows:

1. Download a copy of an  XAMPP Linux version from the site Download XAMPP   . For example,  we can download the file
https://www.apachefriends.org/xampp-files/5.5.35/xampp-linux-x64-5.5.35-0-installer.run

2. Run cd command to go to your directory and execute the installation file:
sudo chmod +x xampp-linux-x64-5.5.35-0-installer.run
sudo ./xampp-linux-x64-5.5.35-0-installer.run

We will see a newly generated pop-up window. Just click the Next button and uncheck the  “Learn more about BitNami for XAMPP” checkbox. We'll install the XAMPP and run it.

To stop the XAMPP, we can:
sudo /opt/lampp/lampp stop
 
To strat  the XAMPP, we can:
sudo /opt/lampp/lampp start

We can try the url http://localhost from our browser to see the page on our server.

And then one important thing to do- set the Security settings:
sudo /opt/lampp/lampp security
 
Always say yes by pressing Enter key and key in our password.


References:
1. How to Install XAMPP 1.8.3 for Linux in Ubuntu Desktop 
2. Setting Security for XAMPP

2016-05-21

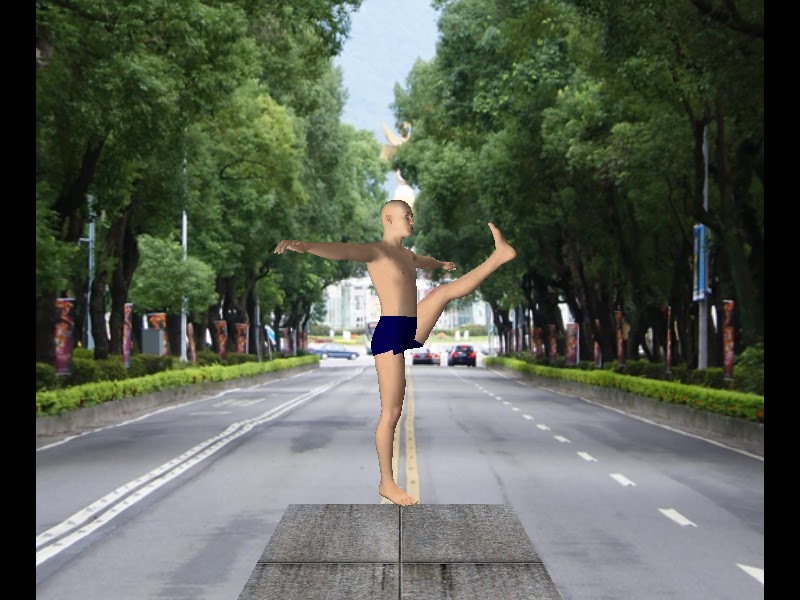
the Muscular Robot-SkinSuitBotM shows the 180 degree Roundhouse Kick

Let's take a look at the Muscular Robot-SkinSuitBotM. It is capable to do lots of the physical fitness movements. He it shows 180 degree Roundhouse Kick:


We can swing the right leg only.

Or we can lift the left knee first,

and swing the right leg.

 Also, we can swing the left leg
 and followed by a right leg swing.


2016-05-18

SkinsuitBotQ on the Stage @HsiaMark

SkinsuitBotQ is  now on the Stage with several postures. @HsiaMark

Check out the video!
 

And look at some screen captures:


2016-05-17

Install a Camera and a Realtime Stream Server on the Raspberry Pi


A Raspberry Pi with a camera can become a real time stream sever. We can select either
UV4L or mjpg-streamer to transmit its streaming data.

UV4L(User space Video4Linux collection) includes a full-featured Streaming Server component providing a set of solutions for live audio & video streaming, casting/mirroring and conferencing over the web. 

On the other hand, the MJPG-streamer takes JPGs from Linux-UVC compatible webcams, file system or other input plugins and streams them as M-JPEG via HTTP to web browsers, VLC and other software.

We can install both on the Raspberry Pi.

First, we connect the Camera bus to the Raspberry Pi board, and the start the raspi-config:

sudo raspi-config

Select item 6 to enable the camera:
6 Enable Camera .......                

Reboot and run tests:

raspistill -o cam.jpg
raspivid -o vid.h264


The image/video window will be shown on the console.


Install MJPEG Stream components:

sudo apt-get update
sudo apt-get install subversion
sudo apt-get install libjpeg8-dev
sudo apt-get install imagemagick
sudo apt-get install libv4l-dev


Get mjpg-streamer from svn:

svn co https://svn.code.sf.net/p/mjpg-streamer/code/
cd code/mjpg-streamer
make
sudo make install


wget http://www.linux-projects.org/listing/uv4l_repo/lrkey.asc && sudo apt-key add ./lrkey.asc
sudo nano /etc/apt/sources.list

Add this line to the file and exit:

deb http://www.linux-projects.org/listing/uv4l_repo/raspbian/ wheezy main


sudo apt-get update
sudo apt-get install uv4l uv4l-raspicam

For autostart service:

sudo apt-get install uv4l-raspicam-extras

sudo reboot


Install uv4l:
sudo pkill uv4l
sudo apt-get update
sudo apt-get install uv4l-uvc
sudo apt-get install uv4l-xscreen
sudo apt-get install uv4l-mjpegstream
sudo apt-get install uv4l-server
sudo reboot


The WebRTC extension for the Streaming Server is also available:
sudo apt-get install uv4l-webrtc
uv4l --auto-video_nr --driver raspicam --encoding mjpeg --server-option '--port=9000' or
uv4l --auto-video_nr --driver raspicam --encoding mjpeg --server-option '--port=9000' --driver raspicam --rotation 180 --width 352 --height 288
Use Browser to link to the uv4l server:    
http://192.168.0.x:9000


sudo modprobe bcm2835-v4l2
cd code/mjpg-streamer
./mjpg_streamer -i "./input_uvc.so" -o "./output_http.so -w ./www"


Use Browser to link to the mjpg-streamer:    
http://192.168.0.x:8080

Reference:
https://dotblogs.com.tw/bowwowxx/2015/06/08/151511

2016-05-12

SkinsuitBotQ-The animation robot actress Q with a leopard print skin suit

May I present you the SkinsuitBotQ ! @HsiaMark
The animation  robot actress Q with Skin Suit.
Robot actress Q wears a leopard print skin suit.


Let's get closer.

She smiles to the audience.

And says thank you.

Also up there,

Looks around the other side.

Let's watch the video of  the SkinsuitBotQ 1:


2016-05-05

Basic Tutorial Samples of Odoo Object Relational Mapping(ORM)

The traditional Odoo Object Relational Mapping(ORM) API passes the database cursor, user id, context dictionary and record ids(usually denoted as cr, uid, context, ids) to all methods. For example:
    self.browse(cr, uid, sids, context=context)

These parameters have been removed from the new Record style API since Odoo 8. But the programs of Odoo are written in traditional style. So it is still very important to understand how it works.

The basic ORM method is search(). We can provide some searching criteria (domain) to the method like [('uuid', '=', uuid)] to screen out the records we want. And the browse() returns the records we need according the input ids parameter.

Here is the sample of search() and browse():

// Sample of reading own records: search(),browse() directly
    def is_in_session(self, cr, uid, uuid, user_id, context=None):
        """ return if the given user_id is in the session """
        sids = self.search(cr, uid, [('uuid', '=', uuid)], context=context, limit=1)
        for session in self.browse(cr, uid, sids, context=context):
                return user_id and user_id in [u.id for u in session.user_ids]
        return False

If we need to access the data of another class, we should use the pool[] to access that class first.

// Sample of Reading records of other class: use pool[] first
    def users_infos(self, cr, uid, ids, context=None):
        """ get the user infos for all the user in the session """
        for session in self.pool["im_chat.session"].browse(cr, uid, ids, context=context):
            users_infos = self.pool["res.users"].read(cr, uid, [u.id for u in session.user_ids], ['id','name', 'im_status'], context=context)
            return users_infos

 
Another useful method is  search_read(). It is a combination of a search() and a read(). We need to prepare the domain for search() and the fields list for read(). Look at this example:
 
// Sample of Odoo ORM search_read(): Performs a search() followed by a read()

    def session_info(self, cr, uid, ids, context=None):
        """ get the session info/header of a given session """
        for session in self.browse(cr, uid, ids, context=context):
            info = {
                'uuid': session.uuid,
                'users': session.users_infos(),
                'state': 'open',
            }
            # add uid_state if available
            if uid:
                domain = [('user_id','=',uid), ('session_id','=',session.id)]
                uid_state = self.pool['im_chat.conversation_state'].search_read(cr, uid, domain, ['state'], context=context)
                if uid_state:
                    info['state'] = uid_state[0]['state']
            return info

The last sample of this tutorial is write().  Just use it to write data back to the records.

// Sample of Odoo ORM write:

    def update_state(self, cr, uid, uuid, state=None, context=None):
        """ modify the fold_state of the given session, and broadcast to himself (e.i. : to sync multiple tabs) """
        domain = [('user_id','=',uid), ('session_id.uuid','=',uuid)]
        ids = self.pool['im_chat.conversation_state'].search(cr, uid, domain, context=context)
        for sr in self.pool['im_chat.conversation_state'].browse(cr, uid, ids, context=context):
            if not state:
                state = sr.state
                if sr.state == 'open':
                    state = 'folded'
                else:
                    state = 'open'
            self.pool['im_chat.conversation_state'].write(cr, uid, ids, {'state': state}, context=context)
            self.pool['bus.bus'].sendone(cr, uid, (cr.dbname, 'im_chat.session', uid), sr.session_id.session_info())

2016-05-02

Experience of Installing Odoo 8.0 on the Ubuntu Platform

    I've tested he installation procedures many times by following Odoo document and google search referral, but there is no successful experience.

    The first problem I met was Ubuntu version. I've installed Ubuntu 16.04. But its default Python is version 3. Odoo needs version 2.7. Many blogs have their own scripts to cope with this issue. But I decided to go back to Ubuntu 14.04 to make my life easier.

    Then I downloaded the .Deb files from Odoo and install by double clicking the Deb file and clicking the Install button. But still,it was not working.

    Finally, go back to "apt-get install" follow some steps in the Odoo installation document with some changes. It works eventually!
 
The steps are:
 
Install postgresql:

sudo apt-get install postgresql-9.3

Install pgadmin3:

sudo apt-get install pgadmin3


Install Odoo on Ububtu 14.04.4

sudo wget -O - https://nightly.odoo.com/odoo.key | sudo  apt-key add -

cd /etc/apt
sudo vi sources.list

Insert "deb http://nightly.odoo.com/8.0/nightly/deb/ ./" into the file

sudo apt-get update 
sudo apt-get install odoo


In this document, there is a section teaching  us how to install in the Deb style Linux:

Deb

To install Odoo 8.0 on Debian-based distribution, execute the following commands as root:
# wget -O - https://nightly.odoo.com/odoo.key | apt-key add -
# echo "deb http://nightly.odoo.com/8.0/nightly/deb/ ./" >> /etc/apt/sources.list
# apt-get update && apt-get install odoo
This will automatically install all dependencies, install Odoo itself as a daemon and automatically start it.
Danger
to print PDF reports, you must install wkhtmltopdf yourself: the version of wkhtmltopdf available in debian repositories does not support headers and footers so it can not be installed automatically. The recommended version is 0.12.1 and is available on the wkhtmltopdf download page, in the archive section. As there is no official release for Debian Jessie, you can find ours on http://nightly.odoo.com/extra/.

Configuration

The configuration file can be found at /etc/odoo/openerp-server.conf
When the configuration file is edited, Odoo must be restarted using service:
$ sudo service odoo restart
Restarting odoo: ok